Sunday, 24 April 2011

21) Project: Lines. Exercise: Implied lines - Page 64.

Deciding the subject.

A perfect opportunity presented itself for both shots to be take, the implied eye line and the extension of a line.  One was the boys on a hay bale; the implied eye line from both children is looking at the hay in the older boy’s hand.  The extension line is two friends, one pulling a silly face, the other pointing and mocking.

The other examples are from my recent images.

Equipment used.

Camera: Canon 500D
Lenses: Canon 18mm-55mm, Tamron 70mm-300mm.

Settings and results.

Matador Image – the implied lines here are as follows:


Threshing corn image – the implied lines are as follows:


Analysis on my 3 images.

The roundabout


The Racing Car


Lamb being born.


Shots taken for exercise.

Implied eye line.


The extension of a line, or lines that point.


Findings and conclusion.

This exercise was mainly about analysis of previous shots taken, apart from the eye-line shot and the extension of a line shot.  I am happy with my analysis of each shot and I am happy with the photos taken to show, with good effect, implied lines.

Friday, 22 April 2011

20) Project: Lines. Exercise: Curves - Page 62.

Deciding the subject.

This was the easiest exercise to date for me, there really was not deciding of a subject or writing a list of things to photograph for this, it was simply a case for me to walk out and about with my camera and see everything on offer, curves everywhere!

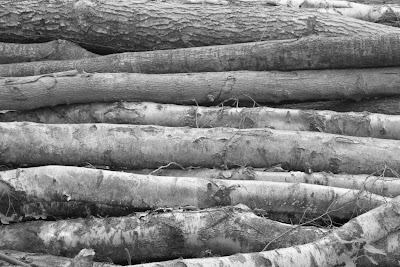
This again was an exercise where one shot decided itself it was just a case of me finding it!  I had an image in my mind of the end of logs, all the rings of age on the tree that had been cut down stacked into a timber pile.

Whilst in the woods, I noticed two very small pine cones that had fallen still attached to the branch, I loved the curves and the way they almost entice the eye into their shadow, wondering what is inside.

Also being spring, it’s a very beautiful time of year, where new things are born and everything begins to grow, so it was very simple for me to photograph the beauty of the curves you can find in a rose.

I was recently asked to do a shoot and photograph a baby bump, you really can’t get much curvier than a heavily pregnant woman and the photo I took really emphasises the curve of her tummy as it is a complete contrast to the background.

Yet one photo, I was in the right place at the right time with my camera in hand, the curves here creating the feeling of protectiveness yet elegance, preparing for the gift of life.

Equipment used.

Camera: Canon 500D
Lenses: Canon 18mm-55mm, Tamron 70mm-300mm.
Flashgun: Canon 430EXII

Settings and results.
IMG: IMG3430ee
Setting: Shutter priority
Focal Length: 300mm
Equivalent in 35mm: 476mm
Shutter Speed: 1/100
Aperture: f/5.6
Flash: Not used
Metering: Matrix
ISO: 320
White Balance: Auto


IMG: IMG5872E
Setting: Aperture priority
Focal Length: 77mm
Equivalent in 35mm: 123mm
Shutter Speed: 1/1000
Aperture: f/5
Flash: Not used
Metering: Matrix
ISO: 100
White Balance: Manual


IMG: IMG5973
Setting: Landscape
Focal Length: 37mm
Equivalent in 35mm: 59.2mm
Shutter Speed: 1/40
Aperture: f/5.6
Flash: Not used
Metering: Matrix
ISO: 250
White Balance: Auto


IMG: IMG5901e
Setting: Manual
Focal Length: 300mm
Equivalent in 35mm: 476mm
Shutter Speed: 1/250
Aperture: f/5.6
Flash: Not used
Metering: Matrix
ISO: 1600
White Balance: Auto


IMG: IMG4552e
Setting: Programme
Focal Length: 124mm
Equivalent in 35mm: 197mm
Shutter Speed: 1/60
Aperture: f/4.5
Flash: Used (flashgun)
Metering: Matrix
ISO: 400
White Balance: Manual


Findings and conclusion.

I absolutely loved this exercise, curves are everywhere and they really can add the grace and elegance to a photo, as the material states. 

IMG3430ee, macro of a rose, really shoes the beauty of the curve on each petal, gently guiding the viewer to the centre of the rose.  However I love the way this shot can work both ways, you can be lead in via the petals, or your attention can be drawn straight to the centre of the flower, then gently work your ways to the edges via the curves.

Without doubt though, IMG5872e is my favourite in this exercise.  I was simply in the right place at the right time with my camera in hand when the swan stood up off the nest and exchanged positions with its partner, taking it in turns to keep the eggs warm.  Swans in my opinion are very elegant creatures to photograph and I love the contrasts here, the swan, standing proud over the nest, the most beautiful curve of the head and neck, casting an eye on the eggs.  This is further added too with the curved lines by the formation of the nest and the eggs themselves, all being curves.

I find when I photograph something that has strong curves, it is either really quite graceful, elegant, something of beauty or something that creates a feeling that I want to find my way through the curves and follow the lines in a maze like fashion, similar to the curves found in IMG5973. 


19) Project: Lines. Exercise: Diagonals - Page 60.

Deciding the subject.

Well this was a little more challenging than vertical and horizontal, but purely because I didn’t simply want to turn the camera to make each shot a diagonal line (although I do like to do this as it is very effective!).  I realise it is more simple to create a diagonal in a shot but I also wanted to get at least one shot where there were ‘true’ diagonals in the shot, something that was made diagonal and should be diagonal, something other than a pitch on a roof. 

Again you will see in this exercise that some beautiful diagonal lines really presented themselves whilst I was walking through the woods, one naturally and one achieved by turning the camera.

For one of the other shots, I was recently asked to photograph a new event in a local nightclub, first time of ever doing a shoot like this and very challenging to say the least shooting in pitch black darkness, however I did get some wonderful shots and in one example here, I saw a tattoo on the arm of the DJ, which I made as my subject tilted to add effect to his ‘mixing’ on the decks.

Finally, my ‘true’ diagonal shot was from our friend ‘Rex the dinosaur’ from Toy Story.  He has beautiful white teeth, diagonal lines everywhere!

Equipment used.

Camera: Canon 500D
Lenses: Canon 18mm-55mm, Tamron 70mm-300mm.
Flashgun: Canon 430EXII

Settings and results.


IMG: IMG5136e
Setting: Aperture Priority
Focal Length: 35mm
35mm Equivalent: 56mm
Shutter Speed: 1/20
Aperture: f/5.6
Flash: Used (Built in)
Metering: Spot
ISO: 400
White Balance: Manual


IMG: IMG5476e
Setting: Manual
Focal Length: 77mm
35mm Equivalent: 123mm
Shutter Speed: 1/3
Aperture: f/5.6
Flash: Used (flashgun)
Metering: Matrix
ISO: 400
White Balance: Manual


IMG: IMG5917ee
Setting: Shutter priority
Focal Length: 109mm
35mm Equivalent:173mm
Shutter Speed: 1/100
Aperture: f/5
Flash: Not used
Metering: Matrix
ISO: 100
White Balance: Manual


IMG: IMG5969
Setting: Landscape mode
Focal Length: 55mm
35mm Equivalent: 87.7mm
Shutter Speed: 1/125
Aperture: f/8
Flash: Not used
Metering: Matrix
ISO: 100
White Balance: Auto


Findings and conclusion.

Once again here in this exercise I stepped completely out of my comfort zone to take shots and really think about the effect it would have when the image was on the big screen.  I am really quite pleased with my shot of the DJs arm, IMG5476e.  This was probably the hardest to achieve, the nightclub was so dark inside that even the strobe lights wouldn’t give me enough light for the auto focus to work.  Therefore, I went to manual focus, as well as manually controlling all aspects of the camera.

The photo taken of my son in the woods, IMG5917ee, again is a shot I am pleased with, the focus is ever so slightly soft, yet turning him and the fallen tree to a diagonal angle really gives the shot a new dimension, a rather dynamic quality, contrasting to the beautiful tones of the browns and the greens.

IMG5969 was the beautiful path that lay ahead of us on our way out of the woods, I love the simplicity of this shot, the natural diagonal angles of the trees, emphasised by the vertical path, all leading to the single point, drawing you into the photo beautifully.  This could, in my opinion have been possibly improved with subjects silhouetted walking away, this type of shot working very well in black and white.

Finally, IMG5136e, Rex the dinosaur and his beautifully white diagonal ferocious looking teeth...says it all!


18) Project: Lines. Exercise: Horizontal and vertical lines - page 56.

Deciding the subject.

Instantly upon reading this section of the course material and the requirements of the exercise the first thought that came to mind was...wood.  I envisaged a log pile piled high, giving a beautiful shot of horizontal lines, where one log met the next and so on and for vertical lines, a shot of the wood in its rightful place, growing as a tree.  And so my journey began with a trip to the woods.

But, this was no ordinary journey, as I knew near where I lived, found by many people before me, yet to be discovered by me, was part of a local estate named Bluebell Woods, which once a year enticed everyone to come and see and indeed smell the beauty of the carpet of bluebells bursting from the ground, confirming indeed that spring had arrived.

It was on successful completion of finding these woods that I was able to take, in my opinion, some wonderful photographs that make up some of the subjects in this exercise. 

Naturally there was also going to be a some shots taken at the beach, which I have found is a wonderful place for texture, lines, and of course for an infamous horizontal line, otherwise known as the horizon.

 And also included is a shot with a difference, taken on a journey, bringing a new meaning to horizontal lines I’m sure and a picture of the most glorious home of Lord Bath - Longleat.  And finally a simple yet I feel effective vertical line shot of my son through a fence.

There are the various subjects used in this exercise which allowed me to gain the best understanding from all difference scenarios.

Equipment used.

Camera: Canon 500D
Lenses: Canon 18mm-55mm, Tamron 70mm-300mm.

Settings and results.

Horizontal Lines.
IMG: IMG5174e
Setting: Programme
Focal Length: 34.9mm
Equivalent in 35mm: 53.8mm
Shutter Speed: 1/1000
Aperture: f/4
Flash: Not used
Metering: Matrix
ISO: 400
White Balance: Auto


IMG: IMG1445
Setting: Aperture Priority
Focal Length: 40mm
Equivalent in 35mm: 63.9mm
Shutter Speed: 1/50
Aperture: f/8
Flash: Not used
Metering: Matrix
ISO: 800
White Balance: Auto
Exposure Bias: -1
IMG: IMG5932e
Setting: Shutter Priority
Focal Length: 50mm
Equivalent in 35mm: 79.8mm
Shutter Speed: 1/100
Aperture: f/11
Flash: Not used
Metering: Matrix
ISO: 100
White Balance: Manual
IMG: IMG5940e
Setting: Landscape
Focal Length: 55mm
Equivalent in 35mm: 87.7mm
Shutter Speed: 1/60
Aperture: f/5.6
Flash: Not used
Metering: Matrix
ISO: 400
White Balance: Auto


Vertical Lines.
IMG: IMG4393
Setting: Shutter Priority
Focal Length: 238mm
Equivalent in 35mm: 377mm
Shutter Speed: 1/80
Aperture: f/9
Flash: Not Used
Metering: Matrix
ISO: 100
White Balance: Manual


IMG: IMG5102e
Setting: Aperture Priority
Focal Length: 32mm
Equivalent in 35mm: 51.2mm
Shutter Speed: 1/160
Aperture: f/10
Flash: Not Used
Metering: Matrix
ISO: 100
White Balance: Manual


IMG: IMG5148e
Setting: Shutter Priority
Focal Length: 55mm
Equivalent in 35mm: 87.7mm
Shutter Speed:  1/160
Aperture: f/7.1
Flash: Not Used
Metering: Matrix
ISO: 100
White Balance: Auto


IMG: IMG5949e
Setting: Landscape
Focal Length: 55mm
Equivalent in 35mm: 87.7mm
Shutter Speed: 1/60
Aperture: f/5.6
Flash: Not Used
Metering: Matrix
ISO: 100
White Balance: Auto


Findings and conclusion.

I can honestly say I thoroughly enjoyed this exercise, having had a few ideas spring to mind as soon as I read the material.  I am extremely pleased with the results of the shots and I think even those of a similar subject nature, I have managed to tackle the shot so they produce very different results.  I think on this exercise my shots are very diverse and I feel they show that I am confident in identifying lines in images, especially when specifically looking for lines to shoot.


17) Project: Points. Exercise: Mulitple points - Page 55.

Deciding the subject.

With Easter fast approaching, this was an exercise that needed me to wait until the Easter Bunny had visited our house.  Easter Sunday arrives, there really was no other subject to use except Easter eggs!  I used a washing basket to hold the ‘fake’ hay, then I simply placed the eggs in one by one.  


Equipment used.

Camera: Canon 500D
Lenses: Canon 18mm-55mm, Tamron 70mm-300mm.
Tripod and built in flash used.

Settings and results.


IMG: IMG6097
Setting: Aperture Priority
Focal Length: 55mm
Equivalent in 35mm: 87.7mm
Shutter Speed: 1/200
Aperture: f/5.6
Flash: Used (built in)
Metering: Matrix
ISO: 100
White Balance: Manual


IMG: IMG6098
Setting: Aperture Priority
Focal Length: 55mm
Equivalent in 35mm: 87.7mm
Shutter Speed: 1/200
Aperture: f/5.6
Flash: Used (built in)
Metering: Matrix
ISO: 100
White Balance: Manual


IMG: IMG6099
Setting: Aperture Priority
Focal Length: 55mm
Equivalent in 35mm: 87.7mm
Shutter Speed: 1/200
Aperture: f/5.6
Flash: Used (built in)
Metering: Matrix
ISO: 100
White Balance: Manual


IMG: IMG6100
Setting: Aperture Priority
Focal Length: 55mm
Equivalent in 35mm: 87.7mm
Shutter Speed: 1/200
Aperture: f/5.6
Flash: Used (built in)
Metering: Matrix
ISO: 100
White Balance: Manual


IMG: IMG6101
Setting: Aperture Priority
Focal Length: 55mm
Equivalent in 35mm: 87.7mm
Shutter Speed: 1/200
Aperture: f/5.6
Flash: Used (built in)
Metering: Matrix
ISO: 100
White Balance: Manual


IMG: IMG6102
Setting: Aperture Priority
Focal Length: 55mm
Equivalent in 35mm: 87.7mm
Shutter Speed: 1/200
Aperture: f/5.6
Flash: Used (built in)
Metering: Matrix
ISO: 100
White Balance: Manual


IMG: IMG6103
Setting: Aperture Priority
Focal Length: 55mm
Equivalent in 35mm: 87.7mm
Shutter Speed: 1/200
Aperture: f/5.6
Flash: Used (built in)
Metering: Matrix
ISO: 100
White Balance: Manual


IMG: IMG6104
Setting: Aperture Priority
Focal Length: 55mm
Equivalent in 35mm: 87.7mm
Shutter Speed: 1/200
Aperture: f/5.6
Flash: Used (built in)
Metering: Matrix
ISO: 100
White Balance: Manual

IMG: IMG6105
Setting: Aperture Priority
Focal Length: 55mm
Equivalent in 35mm: 87.7mm
Shutter Speed: 1/200
Aperture: f/5.6
Flash: Used (built in)
Metering: Matrix
ISO: 100
White Balance: Manual
IMG: IMG6106
Setting: Aperture Priority
Focal Length: 55mm
Equivalent in 35mm: 87.7mm
Shutter Speed: 1/200
Aperture: f/5.6
Flash: Used (built in)
Metering: Matrix
ISO: 100
White Balance: Manual


IMG: IMG6107
Setting: Aperture Priority
Focal Length: 55mm
Equivalent in 35mm: 87.7mm
Shutter Speed: 1/200
Aperture: f/5.6
Flash: Used (built in)
Metering: Matrix
ISO: 100
White Balance: Manual


Findings and conclusion.

This was my third sequence of eggs and I am very pleased with the results.  In the first two attempts, I was simply finding myself placing the majority of eggs altogether and having a single egg opposing the group, creating a very similar scenario to the images in the previous exercise, the relationship between points.  I wasn’t happy with this, so I carried on until I produced images I was happy with.

I was considering each mo ve carefully and I love the way you can watch the composition appear before your eyes, one egg at a time.  I began by placing the first egg, working around that, then very quickly I realised I would just end up with a group, so in IMG6101 you can see I took the next step away from the main group and started to alter the composition quite dramatically.

By IMG6107, the final image, you can see that really there are two defined areas of points, that almost balance each other, but have a connecting point also, which I feel leads the eye across the image.  They almost create flower shapes but I am sure they can be looked at and generate different feelings within different viewers.

Happy Easter!
Sorry – just couldn’t resist!


Thursday, 21 April 2011

16) Project: Points. Exercise: The relationship between points - Page 54.

Deciding the subject.

As suggested in the material, this was indeed a bit of a challenge to find naturally occurring situations where there are indeed two points in the frame only.  Having seen many opportunities and not having been able to capture them, 2 butterflies dancing, 2 birds flying at perfect distances apart (this will teach me for not having my camera in hand all the time) I continued in my quest, looking at all available types of shots, then spending a day in the glorious sunshine in the garden with my children, bang 2 shots come at once! 

Now I cannot be certain that these shots are what can be referred to as normally occurring to most people, but when examining them, these are normal occurrences in a household with kids, my household.  Washing pegs being attacked and playfully thrown across the garden and toys being left were they were last played with, this to me is a natural occurrence in the same essence as seeing two boats on water as per the material.

The final image is our family cat, playing blissfully unaware I was going to use her eyes instead of a human face to show when tension is created having two equal points at equal distance from the centre.
  
Equipment used.

Camera: Canon 500D
Lenses: Canon 18mm-55mm, Tamron 70mm-300mm.

Settings and results.
IMG: IMG6029
Setting: Shutter Priority
Focal Length: 33mm
Equivalent in 35mm: 52.8mm
Shutter Speed: 1/80mm
Aperture: f/4.5
Flash: Not used
Metering: Matrix
ISO: 200
White Balance: Manual


IMG: IMG6031
Setting: Shutter Priority
Focal Length: 39mm
Equivalent in 35mm: 62.3mm
Shutter Speed: 1/60
Aperture: f/5
Flash: Not used
Metering: Matrix
ISO: 200
White Balance: Manual


IMG: IMG5427e
Setting: Manual
Focal Length: 55mm
Equivalent in 35mm: 87.7mm
Shutter Speed: 1/60
Aperture: f/5.6
Flash: Used
Metering: Matrix
ISO: 400
White Balance: Manual


Findings and conclusion.

IMG6029 is made up by a discarded crocodile harmonica and a random weed growing in the garden.  The eyes are drawn primarily to the crocodile, being the bigger point within the picture, however, one of the reasons I took this shot was the way the crocodile was facing the flower and seemed to be a little bit buried in the grass, almost ready to pounce.  It is looking at the image and the crocodile that then leads the eye to the weed as I really don’t think the weed is overly visible on first glance due to its size and weak presence within the shot.

IMG6031, The pegs.  This is clearly a shot that is dominated by the sheer size of the basket of pegs and the vibrant colours and textures it holds and due to its size it places the point near the centre of the image.  The peg just ‘sitting’ at the side of the image, looking lost and forlorn, really grasps little attention from the eye, however it grasps enough that when I do look at it I just want to put my hand in the picture, pick it up and put it back in the basket, is that just me? 

You can see the implied line in both shots, more so in the crocodile flower shot.  It is much easier to show where the implied line is here, as the crocodile is facing almost perfectly the flower.

Finally IMG5427e, cats eyes.  This is a shot of our family cat, however I can see that the composition is ever so slightly off centre as there is a little more space around her one side, however, this would not appear to detract from the strength of the image and indeed the look in her eyes, like she is ready to pounce.  I think in this instance it indeed activates the image, brings her alive and gives you a sense of tension from her, I find myself really staring into her eyes, being absorbed almost back to when I shot the image.

Overall I am happy with this exercise and the results produced, it was a challenging exercise finding such subjects that will highlight the relationships between points clearly.  

15) Project: Points. Exercise: Positioning a point - page 53.

Deciding the subject.

Well, after successful completion of my first assignment, I felt it was important for me to review my work to date and see if I can continue to improve, not just by following the guidelines in the book, but also reviewing what I had done to date.

I am very pleased with some of my shots I have previously taken, however I noticed that many of them were in ‘my comfort zone’ so i decided to set myself the personal challenge of at least pushing myself on occasion to find new subjects I wouldn’t normally shoot. 

Therefore on this exercise, as well as others coming up I am sure, I have made conscious decisions to actually travel around the beautiful part of the country I live, exploring the county as I never have before, photographing what it has to offer along the way.  I will also be using some shots taken indoors, as again this is perhaps the one place I ‘forget’ to consider when looking for suitable subjects.

Subjects here are, my son’s eye, an early attempt at macro, a bee in my local park and finally my other son exploring the woods!

Equipment used.

These shots were taken handheld, no tripod used, except for the eye shot.
Camera: Canon 500D
Lenses: Canon 18mm-55mm
Tamron 70mm-300mm (macro switch)

Settings and results.

IMG: IMG3766
Setting: Aperture Priority
Focal Length: 300mm
Equivalent in 35mm: 476mm
Shutter Speed: 1/13
Aperture: f/8
Flash: Not Used
Metering: Matrix
ISO: 1600
White Balance: Auto


IMG: IMG5847e
Setting: Manual
Focal Length: 300mm
Equivalent in 35mm: 476mm
Shutter Speed: 1/400
Aperture: f/5.6
Flash: Not Used
Metering: Matrix
ISO: 100
White Balance: Manual


IMG: 5902
Setting: Shutter Priority
Focal Length: 70mm
Equivalent in 35mm: 111mm
Shutter Speed: 1/100
Aperture: f/4
Flash: Not Used
Metering: Matrix
ISO: 100
White Balance: Manual


Findings and conclusion.

Well leaving my comfort zone was quite a challenge, but I think it can be seen in the results...well worth it.  IMG3766, a macro shot of my son’s eye, being one of my first attempts at macro, I think proved a success.  The point being the eye, set upon a plain background being the skin, is enough of a contrast to make this successful.  The point here is placed pretty central to the frame, which tends not to work in most cases, yet I feel in this instance, perhaps this is one of those cases where this is the exception to the rule.  The eye has some wonderful curves and features and this is ever so slightly placed at an angle within the frame, creating in my opinion a bit more movement.

IMG5847e, the bee collecting, again is another attempt at macro, which again I feelwas successful and produced a wonderful result.  The shot was taken whilst out walking and I am very pleased with the detail captured as this was taken free hand (no tripod) and I also shot this one in full manual mode!!  As you can see the point in this shot is clearly the bee and is slightly off centre, adding movement by drawing the eye to the bee in all its glory. 

Finally, IMG5902.  This is my other son exploring, on his very first trip to the woods.  He is crouching down looking around and I captured the moment, as he stands out beautifully from his surroundings.  I never considered using a person as a point whilst completing this exercise, however once I saw this shot then took it, I realised that it can work extremely well.  I placed him as close to the edge as I could without losing any of the other detail in the shot and having the fallen tree leading you in to the picture adds to the effect.